Betopper バリューライティングセットアップ
コストを抑えて会場照明をアップグレードしたいですか?
Betopperのバリューセットアップは、バー、クラブ、ライブショーなどの小規模会場向けに設計されています。
ウォッシュライト、ビーム、そして高CRIパーライトをひとつのスマートパッケージに集約。
回転ビーム、超高輝度出力、そしてリアルな色再現をお楽しみいただけます。
プロフェッショナルなエフェクトに必要なすべてを、コストの一部で実現。
DJ、会場オーナー、そして本格的なライティングをシンプルに楽しみたいパフォーマーに最適です。
Fast Groove — 当社カスタムMA2セットアップ
Slow Groove — 当社カスタムMA2セットアップ
Rhythm Ready — 当社カスタムWolfmixセットアップ
Creating a custom Wolfmix setup for a "Slow Groove" lighting experience involves designing a dynamic and atmospheric light show that complements the slow, rhythmic vibe of the music. Wolfmix is an advanced lighting control system often used in DJ setups to synchronize lights with music. Below is a detailed breakdown of how you can configure your Wolfmix for this theme: --- ### **1. Understanding the Vibe** - **Slow Groove**: This style typically features laid-back beats, deep basslines, and smooth transitions. The lighting should reflect this mood—soft, fluid, and immersive. - Think warm colors, gradual fades, and subtle movements to enhance the hypnotic groove. --- ### **2. Equipment Checklist** Ensure you have the following: - **Wolfmix Controller** (e.g., WLF1 or WLC1) - LED Par Cans - Moving Head Spotlights - Laser Lights (optional for added depth) - Strobe Lights (used sparingly for accents) - DMX Cables and Power Supply --- ### **3. Programming Your Wolfmix Setup** #### **Step 1: Assign Fixtures** - Use the Wolfmix app or hardware interface to assign all connected fixtures to specific channels. - Group similar fixtures together (e.g., all pars as one group, moving heads as another). #### **Step 2: Choose Colors** - Select a palette of warm tones such as: - Deep reds - Golden yellows - Soft purples - Warm whites - Avoid harsh, contrasting colors like bright blues or greens unless they fit the track's progression. #### **Step 3: Set Up Effects** - **Pars:** Use slow color fades and dimming effects to create a pulsating ambiance. - **Moving Heads:** Program smooth pan/tilt movements with narrow beams to sweep across the room gently. - **Lasers:** If using lasers, set them to produce slow, sweeping patterns rather than fast, erratic ones. - **Strobes:** Keep these at low intensity or use them only during climactic moments in the mix. #### **Step 4: Sync with Music** - Enable BPM synchronization on your Wolfmix controller. - Match the speed of light changes to the tempo of the music: - For example, if the track is 100 BPM, program light fades and movements to occur over 4-8 beats. - Utilize the "Tap Tempo" feature to manually adjust timing if needed. #### **Step 5: Create Scenes** - Build multiple scenes within Wolfmix that correspond to different sections of your set: - Intro Scene: Subtle fades and minimal movement. - Build-Up Scene: Gradually increase intensity with wider sweeps and brighter colors. - Drop Scene: Introduce more dynamic effects while staying true to the slow groove aesthetic. - Outro Scene: Return to softer, calming visuals. #### **Step 6: Automate Transitions** - Use Wolfmix’s automation tools to smoothly transition between scenes without abrupt changes. - Crossfades work well here; ensure transitions last several seconds to maintain the relaxed atmosphere. --- ### **4. Additional Tips** - **Layering Effects:** Combine static washes from pars with moving head effects for depth. - **Sound Reactive Mode:** Experiment with sound-reactive modes for organic responses to the music. - **Minimalism is Key:** Don’t overload the space with too many competing effects—less is more for a Slow Groove setup. - **Test Runs:** Rehearse your setup before the event to fine-tune timings and transitions. --- ### **5. Example Configuration** Here’s a sample configuration for a typical Slow Groove session: - **Fixture Groups:** - Group 1: LED Pars (warm wash) - Group 2: Moving Heads (slow sweeps) - Group 3: Lasers (gentle fans) - **Effects Timeline:** - 0:00–1:00: Static warm glow (Intro) - 1:00–2:30: Slow color fade + gentle sweeps - 2:30–4:00: Add laser fans, slightly brighter wash - 4:00–5:00: Peak moment with increased movement and brightness - 5:00–End: Fade back to calm, static glow --- By carefully planning and programming your Wolfmix setup, you’ll create an unforgettable Slow Groove experience that perfectly matches the music’s energy and keeps the audience captivated. Let me know if you need help troubleshooting any part of your setup! 🎶✨

Fast MA2 ファイルダウンロード
Slow MA2 ファイルダウンロード
Fast Wolfmix ファイルダウンロード
Slow Wolfmix ファイルダウンロード
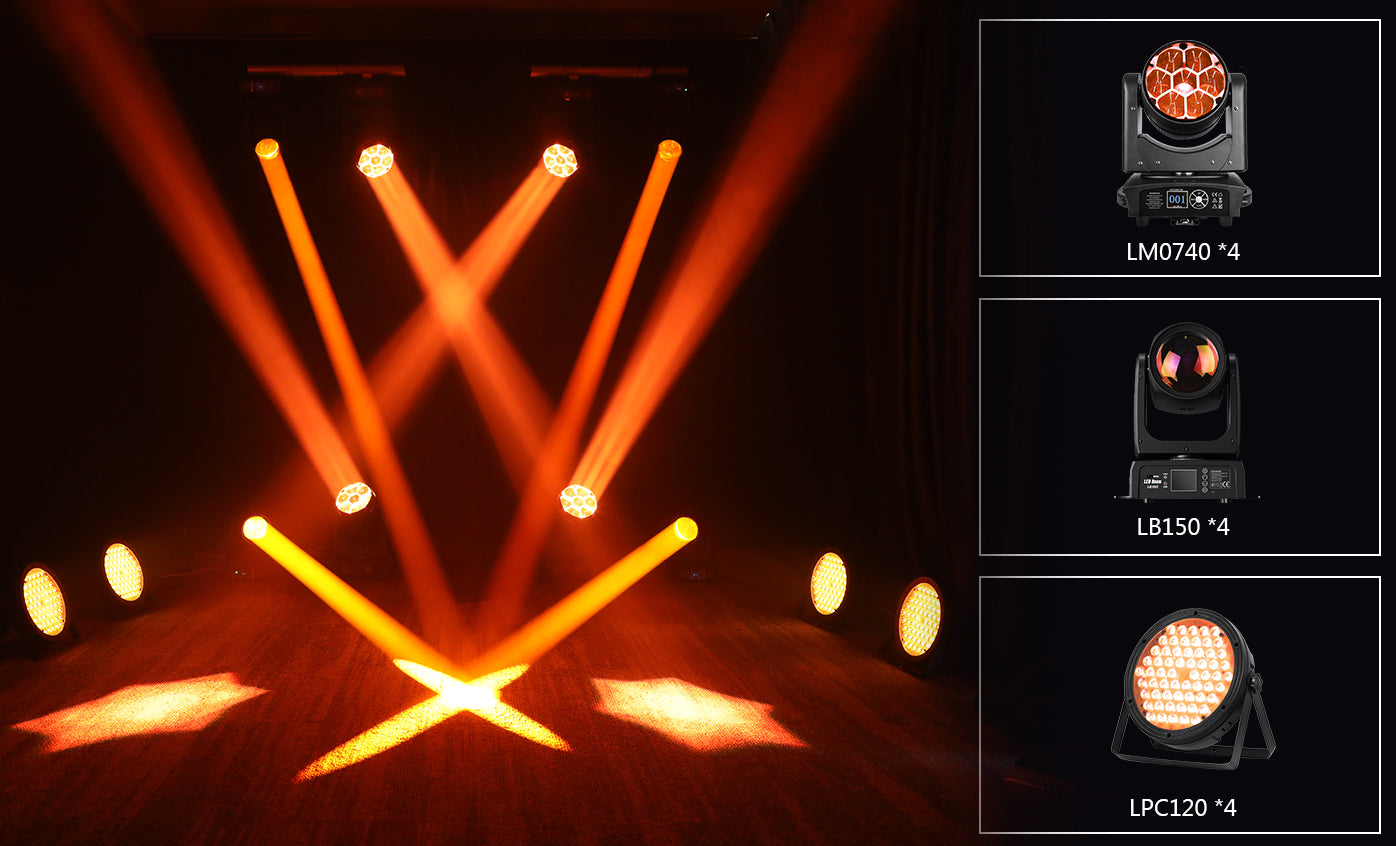
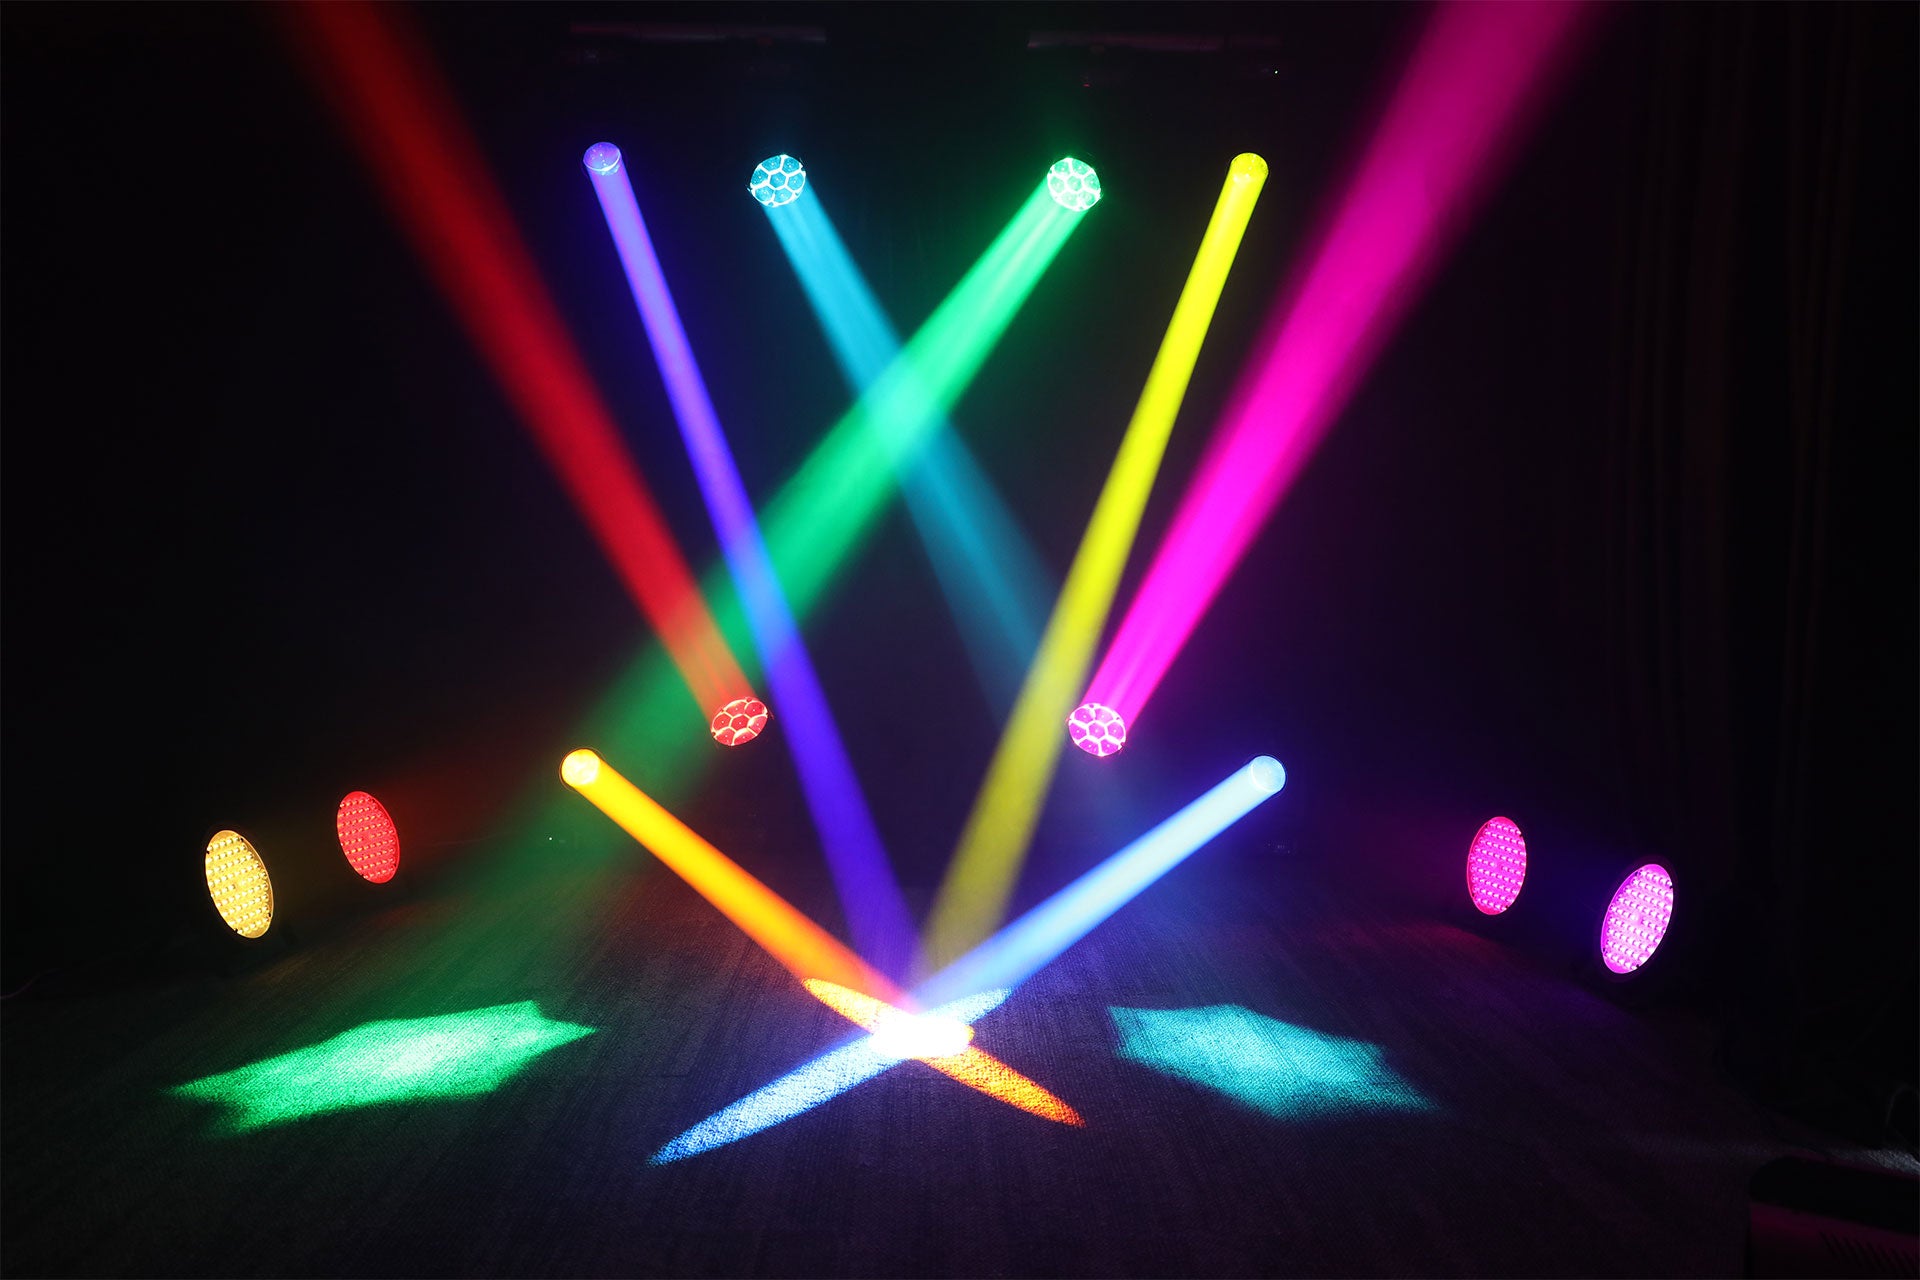
このライティングセットアップに含まれるもの
- 4× LM0740 ウォッシュライト – ズーム付きでスムーズなカラーフェードを実現し、ステージ全体を広くカバー。
- 4× LB150 ビームライト – 強烈でナローなビームにより、力強い空中エフェクトを演出。
- 4× LPC120 パーライト – 高CRI LEDによって、鮮やかで自然な色再現を実現。
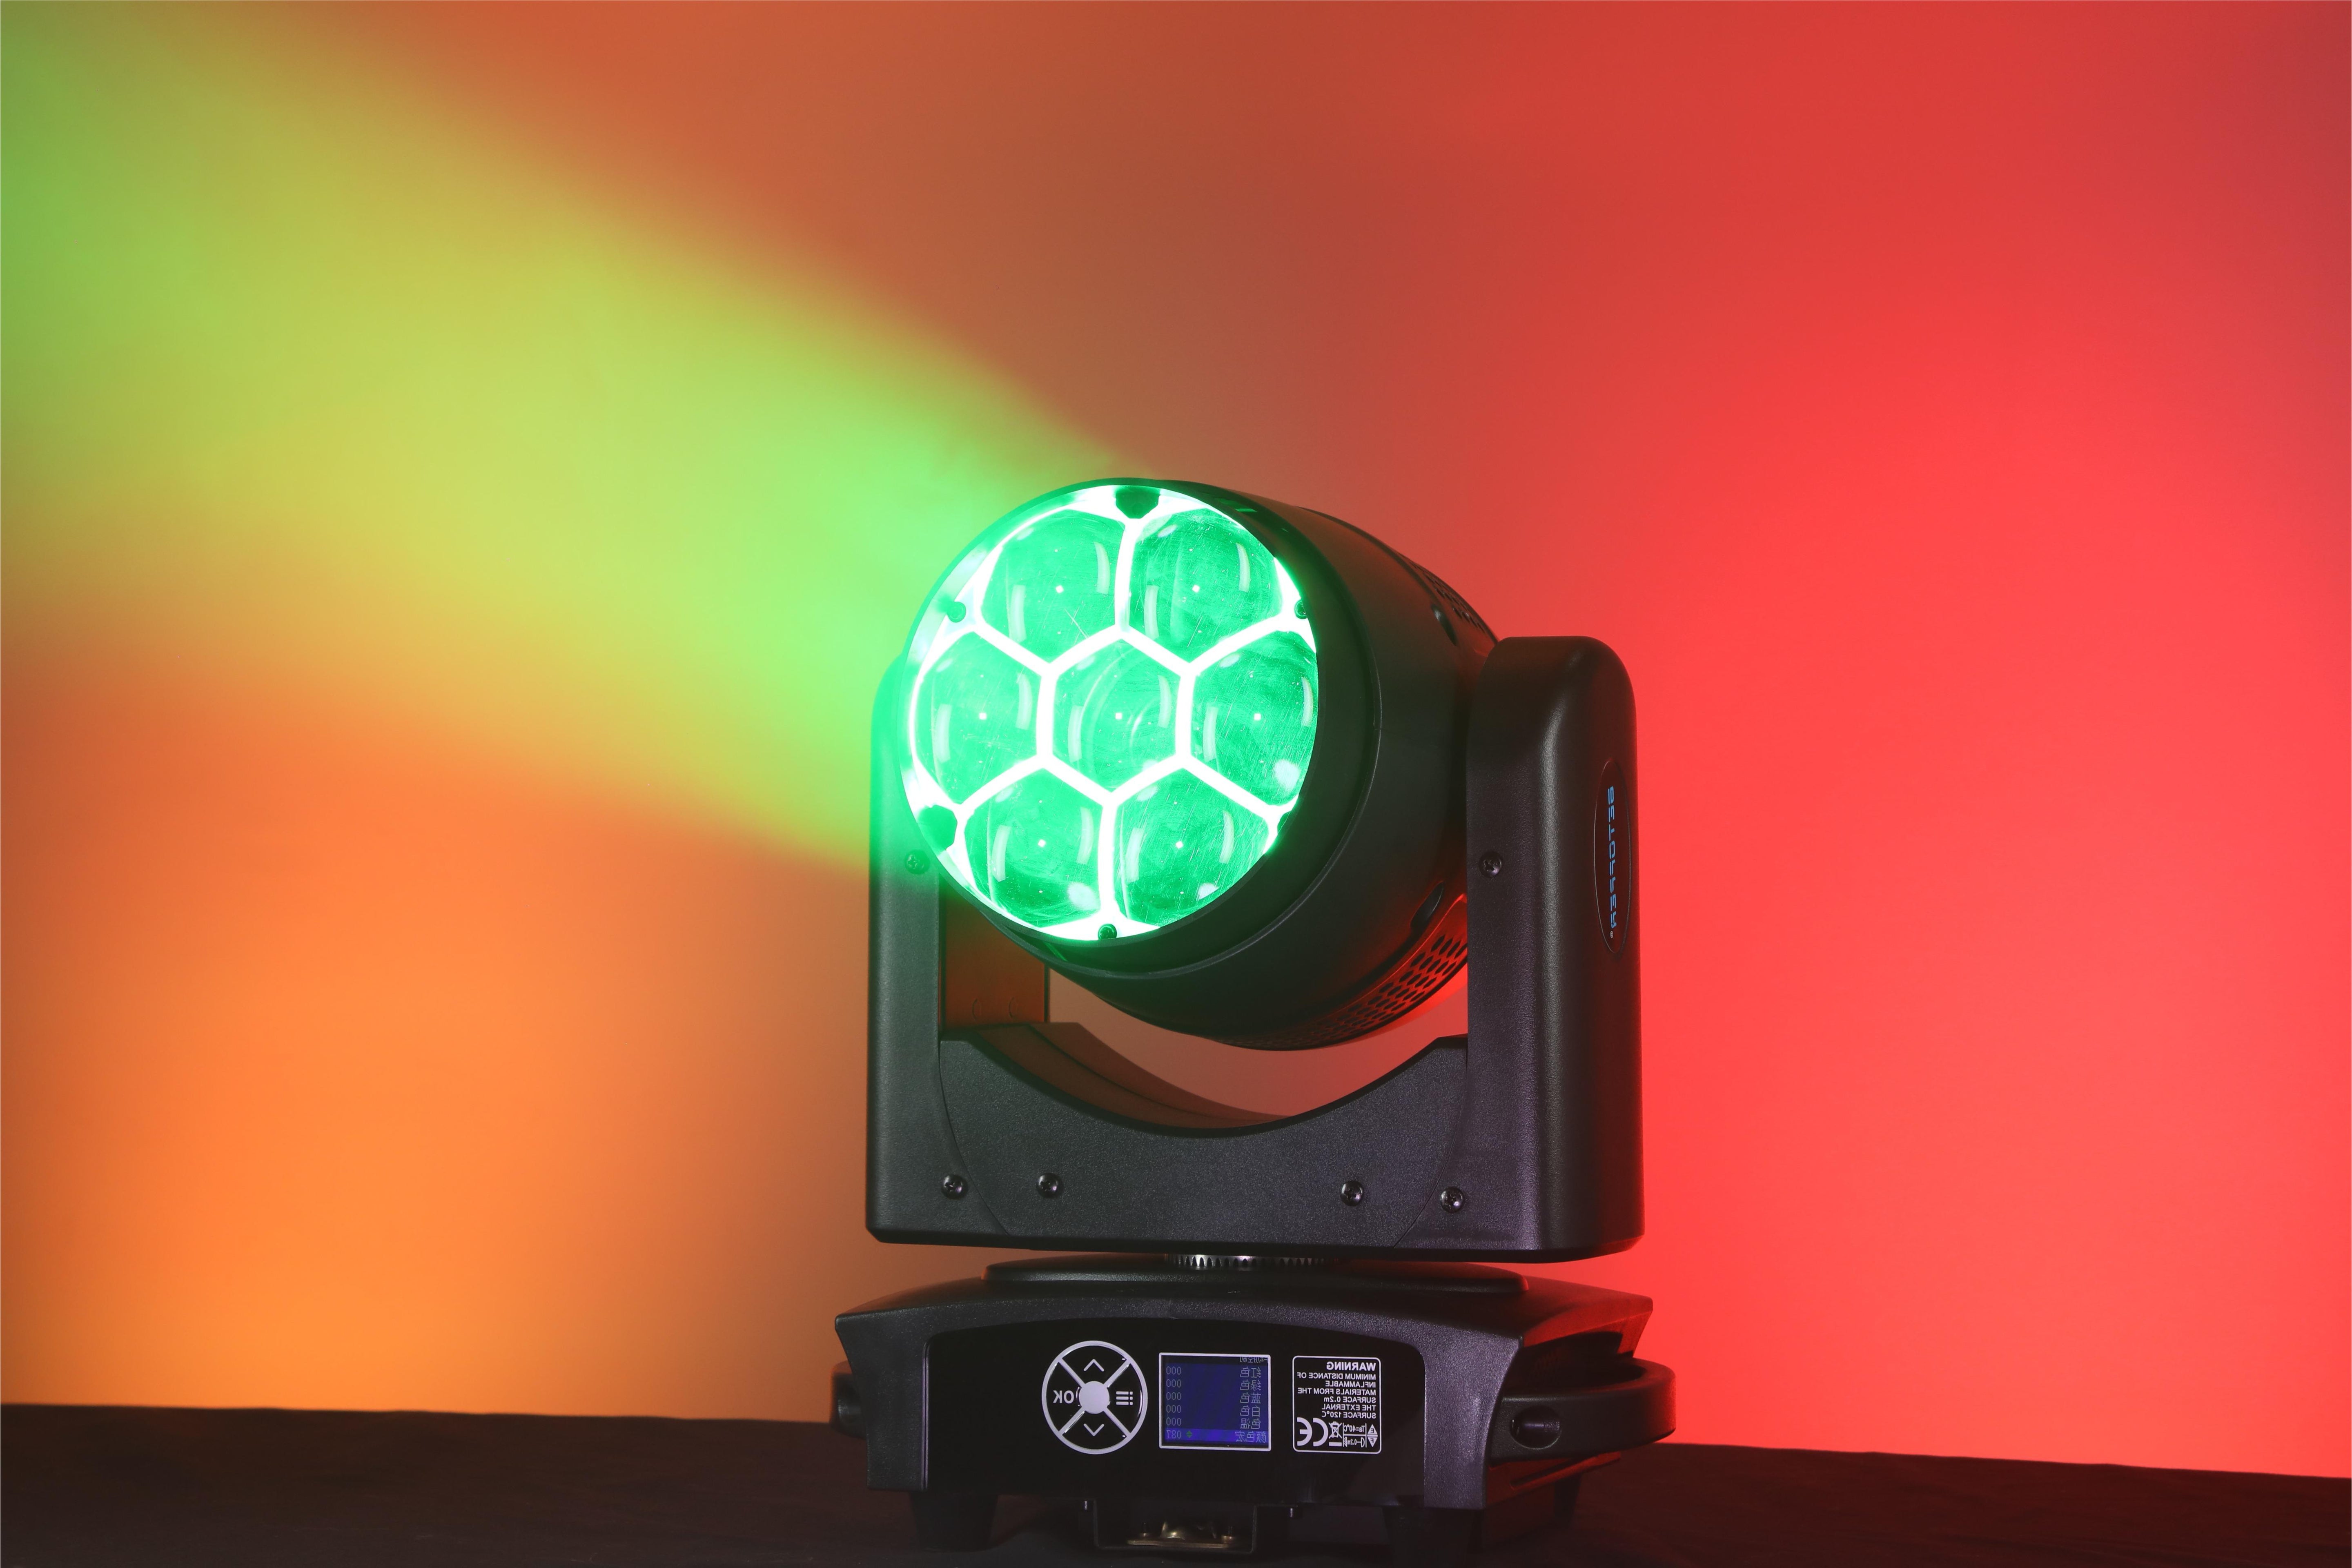
Betopper LM0740
- 40WのパワフルなLEDでウォッシュとビームエフェクトを実現
- コンパクトで多用途、さまざまな照明ニーズに対応
- 回転とズーム機能を備え、鮮やかな拡散効果を演出
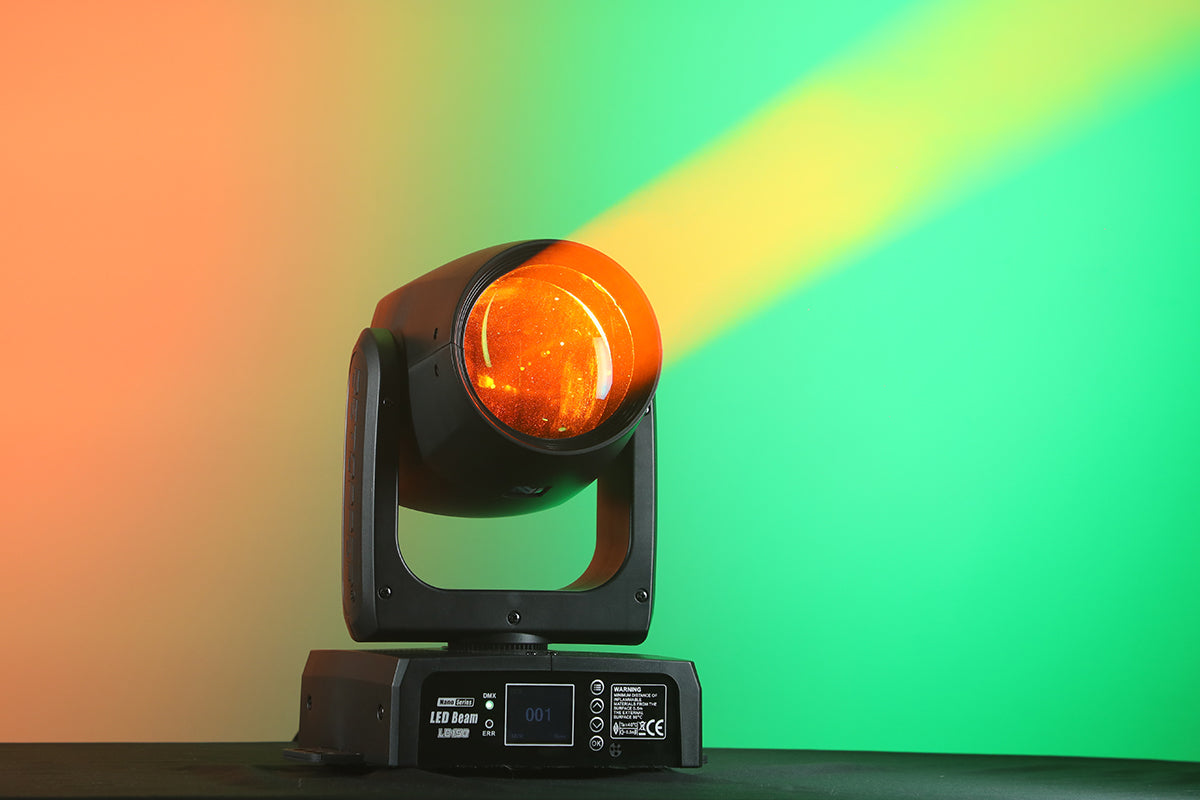
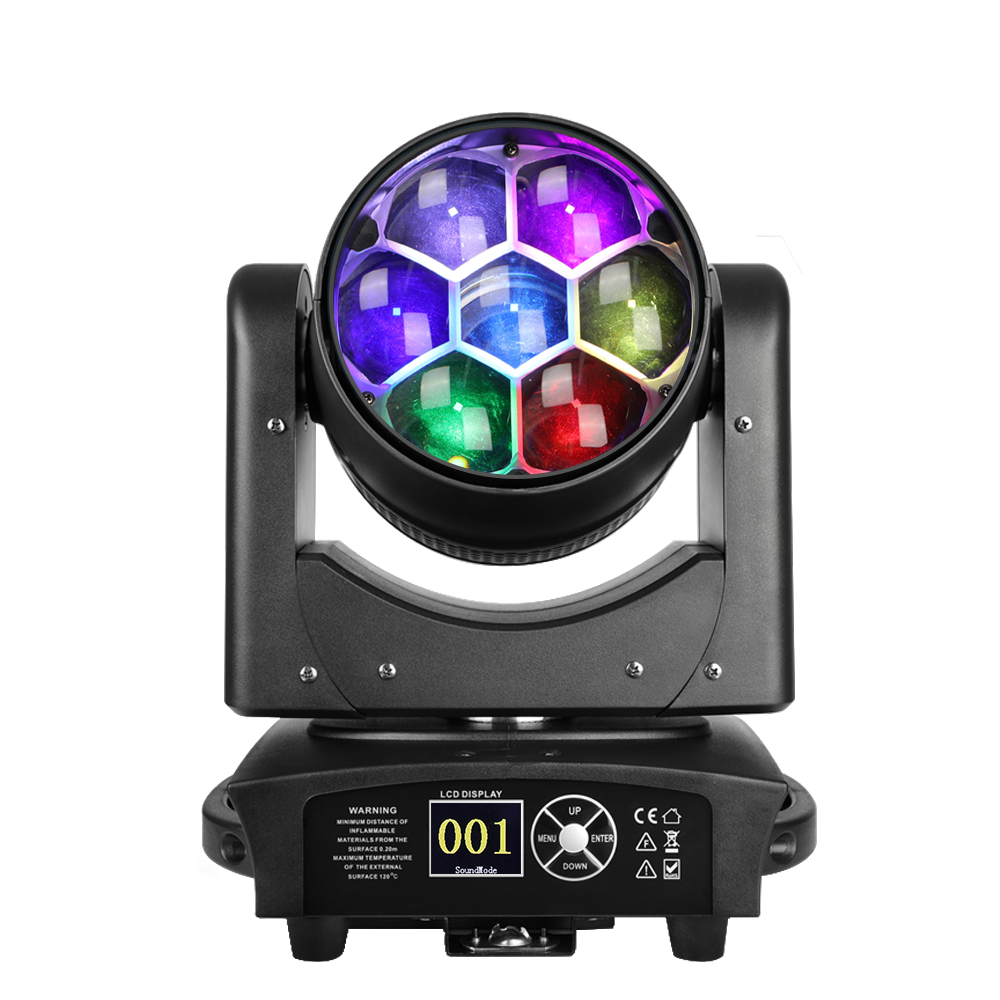
Betopper LB150
- LCDパネル搭載、オートモード&サウンドモード対応
- 柔軟なマウントで簡単に設置可能
- 1.72°のビームは標準的な200Wライトを凌駕
- 多様な環境で活躍するプロフェッショナル性能

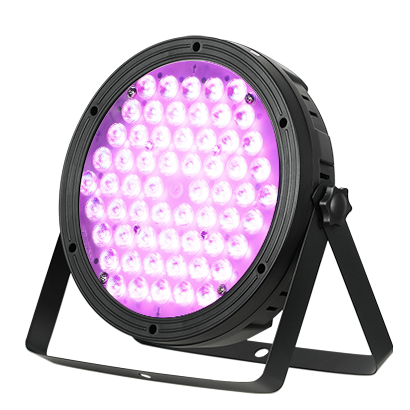
Betopper LPC120
- 高CRI(90+)で自然な色再現
- 3500ルーメン – 超高輝度でコストパフォーマンス抜群
- RGBW LEDによる純粋で鮮やかなカラー
- DMX/オート/サウンドモード対応 + 信頼性の高い冷却システム
Betopper LM0740
- 40WのパワフルなLEDでウォッシュとビームエフェクトを実現
- コンパクトで多用途、さまざまな照明ニーズに対応
- 回転とズーム機能を備え、鮮やかな拡散効果を演出
Betopper LB150
- LCDパネル搭載、オートモード&サウンドモード対応
- 柔軟なマウントで簡単に設置可能
- 1.72°のビームは標準的な200Wライトを凌駕
- 多様な環境で活躍するプロフェッショナル性能
Betopper LPC120
- 高CRI(90+)で自然な色再現
- 3500ルーメン – 超高輝度でコストパフォーマンス抜群
- RGBW LEDによる純粋で鮮やかなカラー
- DMX/オート/サウンドモード対応 + 信頼性の高い冷却システム


シーンディスプレイ


FAQ(よくある質問)
その他のご質問は、いつでもお問い合わせください。
shopify@betopperdj.com
配送は無料ですか?納期はどのくらいですか?
はい、ほとんどの地域で送料無料を提供しています。製品が在庫にある場合、通常3~8営業日程度でお届けします(地域によって異なります)。
保証期間はどのくらいですか?
当社製品には2年間の保証が付いています。詳細な保証条件については、アフターセールスポリシーをご参照ください。
DMXフィクスチャープロファイルファイルを提供していますか?
はい、照明コンソール用のDMXフィクスチャープロファイルファイルを提供可能です。カスタマーサービスにお問い合わせください。
屋外で使用できますか?
現在、防水対応の屋外モデルは提供しておりません。屋外で使用する場合は、必ず天候が良く乾燥した環境でご使用ください。故障の原因となる可能性があります。