Introduction
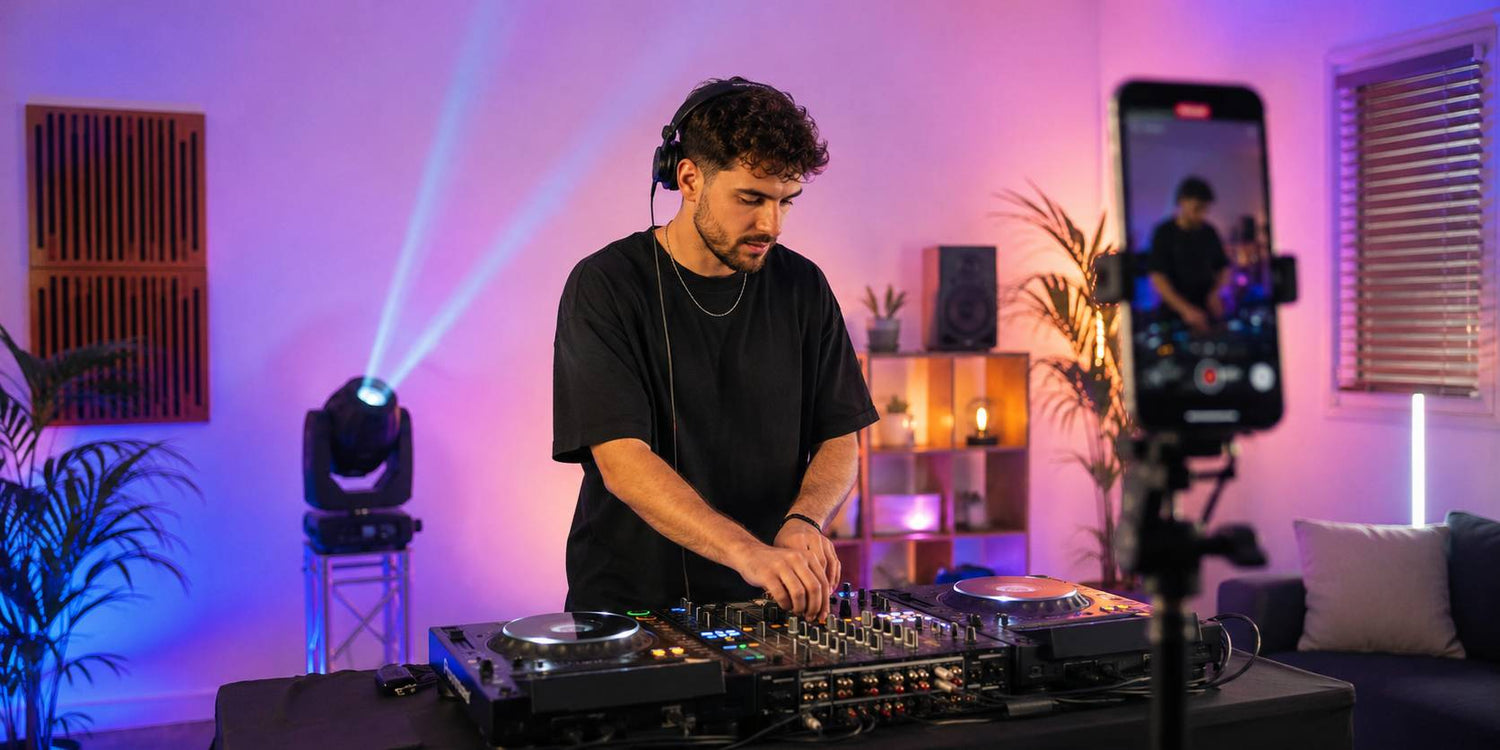
A DJ setup can feel powerful in the room but look less impressive once it appears on TikTok, Instagram Reels, YouTube Shorts, or a promo video.
That difference usually comes from how the camera reads the scene. In person, people experience the sound, movement, room atmosphere, lighting, and energy together. On video, everything becomes a single frame: the DJ, the booth, the lights, the background, the cables, the wall, the camera angle, and the audio quality.
For a DJ setup video to look professional, the whole frame needs to work as one visual system. Lighting direction, background control, color choice, camera height, movement, and audio all affect how the setup feels on screen.
This guide explains how home DJs, mobile DJs, and content creators can make a DJ setup look better on video and social media by improving framing, lighting structure, color control, movement, audio, and simple DMX planning.
Start With the Frame, Not the Room
A live DJ setup is designed for people standing in the room. A video setup is designed for what the camera can see.
The camera only captures a limited part of the space. If that frame is crowded, uneven, too dark, too bright, or visually confusing, the final video will feel less polished even if the room itself feels good.
Before recording, look at the camera preview and ask:
- Is the DJ clearly visible?
- Are the decks, booth, and background lighting working together?
- Is the background clean enough for the viewer to focus?
- Are cables, cases, bags, or random objects visible?
- Is the brightest light helping the frame or distracting from it?
- Does the shot look intentional in the first three seconds?
For TikTok, Instagram Reels, and YouTube Shorts, vertical framing should be planned from the start. A vertical DJ setup video is not just a cropped version of a wide shot. It needs its own structure: background lighting at the top, DJ and booth in the center, and hands, gear, or crowd energy near the bottom.
A strong frame makes the entire DJ setup easier to understand at a glance.
Clean the Background Before Adjusting the Lighting
The background has a bigger impact on DJ setup videos than many people expect.
A wall with clutter, open cases, extra bags, visible packaging, loose cables, or random furniture can make even a strong setup look unfinished on camera. These details may feel minor during the setup process, but video makes them more noticeable.
Before recording, clean the part of the room that appears in the frame.
Use this quick check:
- Move empty cases and bags away from the camera view
- Keep visible cables as tidy as possible
- Avoid random objects behind the DJ booth
- Use a clean wall, curtain, backdrop, or controlled background
- Remove reflective objects that catch unwanted light
- Keep the visual focus around the DJ, booth, and lighting
A clean background does not need to look expensive. It just needs to look controlled.
Once the background is organized, lighting becomes much more effective because the viewer’s attention stays on the performance area instead of the clutter around it.
Build a Three-Layer DJ Video Lighting Setup
A professional-looking DJ setup video usually has depth. The easiest way to create that depth is to build the frame in three lighting layers.
Layer 1: Front Visibility
The DJ and the gear should be visible enough for the viewer to connect with the performance. If the DJ is completely dark, the video may feel distant or unfinished.
This does not mean the front light has to be bright or harsh. It should simply help the DJ and booth stay readable on camera.
For users who want a cleaner front or area wash, the Betopper LPC010-B series can be considered for more natural-looking visibility in small indoor DJ setups, content recording spaces, or event environments.

Layer 2: Background Color
The background gives the video atmosphere. A plain wall or dark corner can make the frame feel flat, while a controlled color wash can give the setup more depth.
Betopper LPC1818 can work well as a color wash option for DJs who want richer RGBWA+UV background atmosphere behind the booth or across a wall. This type of color layer helps the DJ area feel more connected to the rest of the frame.

Layer 3: Controlled Movement
Movement keeps the frame alive, but it needs to feel connected to the music and camera angle.
A bar light such as the Betopper L1015 can create clean lines behind or beside the booth, which often reads well in short-form video. For dynamic wash movement, fixtures such as Betopper LM0740 or LM1915R can help add motion and color variation in the background when used with controlled speed and direction.
The goal is to give each light a role: visibility, background color, visual lines, or movement. When the lighting has structure, the setup feels more intentional on camera.

Use Lighting to Create Depth, Not Just Brightness
Video lighting is not only about making the room brighter. It is about helping the camera separate the DJ, booth, and background.
If everything in the frame is equally bright, the image can look flat. If the background is much brighter than the DJ, the viewer’s attention goes to the wrong place. If a strong fixture points directly into the lens, the image may look harsh or overexposed.
A cleaner lighting structure usually includes:
- A readable DJ area
- A colored or textured background
- Some separation between the DJ and the wall
- Controlled highlights instead of constant direct glare
- Movement that supports the music rather than dominating the frame
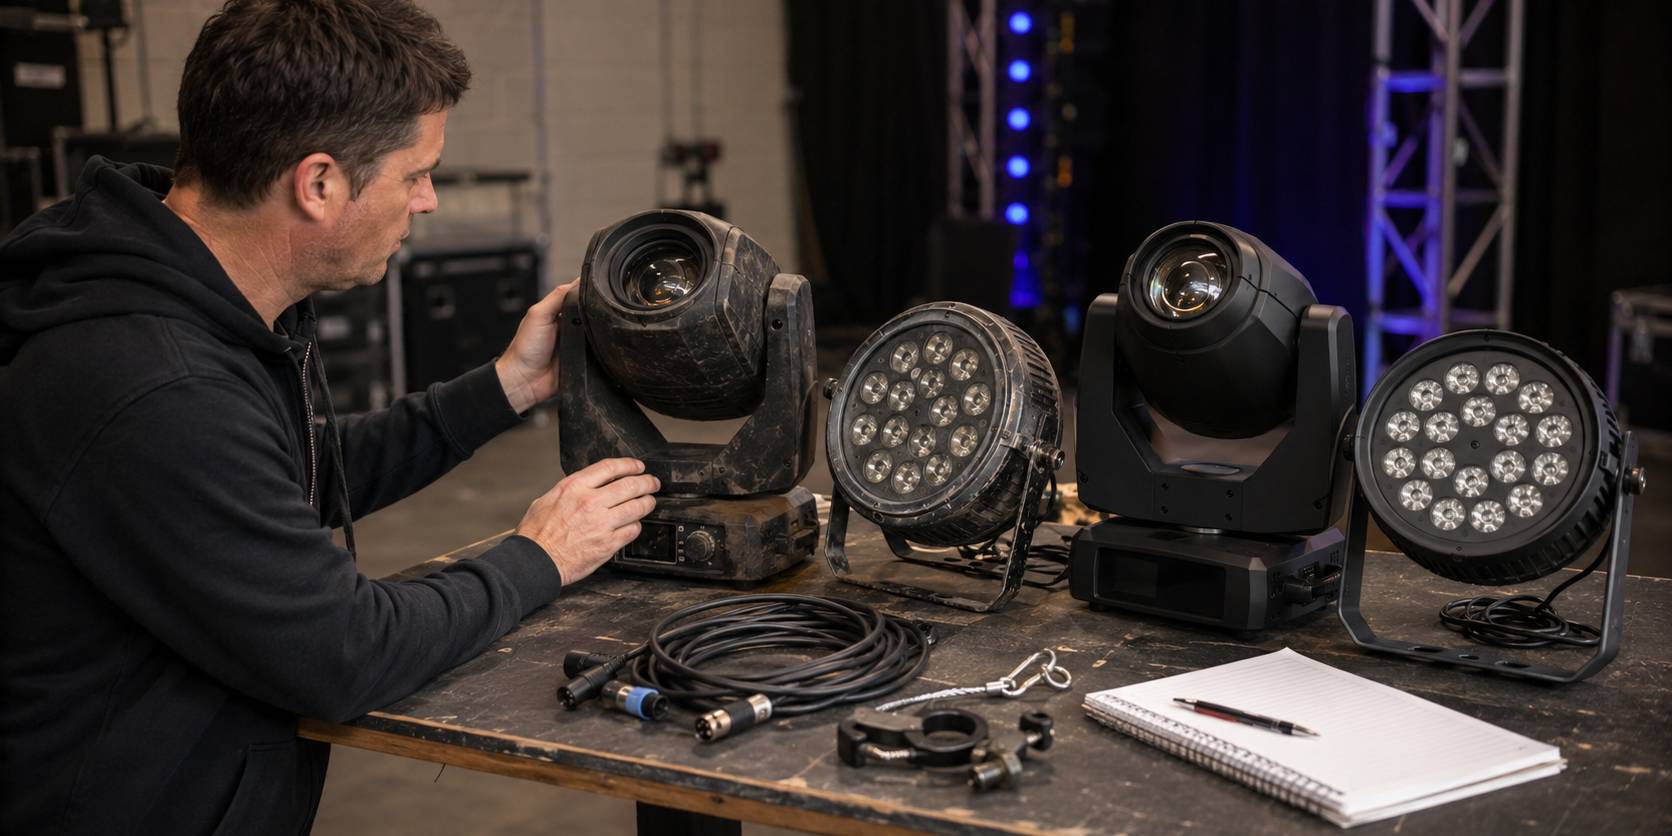
Wash lights and PAR lights are especially useful for this base structure. They help create the foundation of the image. Once that foundation is clear, moving heads, beam effects, and accent lights look more connected instead of random.
Choose Colors That Look Clean on Camera
Color choices that feel exciting in person can sometimes look messy on video.
Cameras may exaggerate saturated colors, especially strong red, deep blue, purple, or green. If too many colors change at the same time, the video can look noisy and less polished.
For DJ setup videos, controlled color usually reads better than constant color switching.
A simple approach:
- Choose one main color
- Add one supporting color if needed
- Keep the DJ area cleaner than the background
- Use stronger colors behind or beside the DJ
- Avoid rapid color changes during every part of the clip
- Use slower transitions for content-focused videos
For example, a blue and purple background can create a club-style look, while a soft white or warmer front layer helps keep the DJ visible. A red-heavy background can look strong, but it should be used carefully if it affects skin tone or makes the frame feel too intense.
The best color choice depends on the mood of the video, not just the available colors in the fixture.
Use Moving Heads as Camera-Friendly Motion
Moving heads can add a strong visual identity to DJ videos, but camera-friendly movement needs control.
Fast random movement may work during a live peak moment, but on video it can pull attention away from the DJ or make the frame feel unstable. The camera needs time to read the motion.
Better movement choices for DJ videos include:
- Slow sweeps across the background
- Gradual movement during build-ups
- Short accents during drops
- Movement that avoids the camera lens
- Effects that follow the energy of the track
- Beam or wash motion used in short moments rather than constantly
Betopper LM0740 and LM1915R are more suitable for controlled wash movement and layered background motion. Beam fixtures such as Betopper LB150 can add energy as accent lighting, but their angle matters. In video, beam effects usually work better when they add direction or rhythm without pointing directly into the camera for long periods.
Movement should feel like part of the music and the frame, not a separate effect running in the background.

Avoid Harsh Light Directly Into the Lens
Direct light into the camera can create glare, overexposure, lens flare, and loss of detail. Sometimes this can be used creatively, but if it happens constantly, the video may look uncontrolled.
Instead of pointing fixtures straight at the camera, shape the light through angle and placement.
Try these practical adjustments:
- Place lights behind or beside the DJ instead of directly in front of the lens
- Aim wash lights at the wall, curtain, or background surface
- Adjust pan and tilt so beams move across the background, not into the camera
- Lower dimmer levels if the image looks blown out
- Use distance and angle to soften the visual impact
- Keep the DJ’s face away from harsh direct beam hits
For a cleaner look, let the background receive the strongest color and movement while the DJ area stays readable. This helps the camera keep detail in both the performer and the lighting environment.
Watch for Flicker When Filming Stage Lights
Sometimes stage lights look normal to the eye but show flicker, banding, or pulsing on a phone camera.
This can happen when the camera’s frame rate or shutter behavior interacts with LED dimming, refresh characteristics, or local power frequency. It can also become more visible at very low dimming levels or during certain strobe and chase effects.
Before recording a full clip, film a short test and watch it back.
If flicker appears, try:
- Switching between 30fps and 60fps
- Avoiding very low dimmer levels on certain effects
- Reducing aggressive strobe or chase settings
- Adjusting the light scene to a steadier look
- Testing another camera app or exposure setting
- Recording a 10-second sample before the full performance
Not every camera and light combination behaves the same way. A quick test helps you choose the cleanest settings before publishing.
Create Simple DMX Scenes for Short Videos
For social media clips, simple lighting scenes often work better than random sound-active flashing.
A short DJ video needs visual moments that match the structure of the music. Even a basic DMX setup can be planned around a few simple scenes.
A useful four-scene structure:
Scene 1: Clean Intro Look
Use a stable background wash, low movement, and enough front visibility for the DJ. This works well for opening shots, talking clips, or slow track introductions.
Scene 2: Build-Up Look
Gradually increase color intensity or add slow movement. The frame should feel like it is gaining energy without becoming visually crowded.
Scene 3: Drop Moment
Use stronger movement, accent beams, or short strobe moments. Keep this controlled and brief so the drop feels intentional on video.
Scene 4: Outro or Ending Look
Return to a stable color or slower movement. This gives the video a clean ending and makes editing easier.
This type of simple DMX planning helps the lighting support the content. It also makes the final video easier to edit because each section has a clear visual role.
Match the Setup to Your Recording Space
A home DJ recording space and a mobile indoor event setup do not need the same visual approach.
Home DJ or Bedroom DJ Setup
A home DJ setup usually has limited space, closer walls, and less distance between the camera, DJ, and lights.
Focus on:
- Clean background
- Lower brightness levels
- Controlled color wash
- Minimal direct glare
- Simple camera framing
- Small movement accents
- Lighting that does not overpower the room
A compact setup may use a clean front wash, a color layer behind the booth, and one controlled movement or line effect to keep the frame active.
Mobile DJ or Indoor Event Setup
A mobile DJ setup in a banquet hall, private party space, small venue, or indoor event room often needs to look good both live and in quick social clips.
Focus on:
- Fast setup and clean cable layout
- Background or booth lighting that defines the performance area
- Simple color scenes for different parts of the event
- Controlled movement for high-energy moments
- A camera angle that captures both the DJ and the atmosphere
For this type of setup, PAR lights, wash lights, bar lights, and moving heads can work together as a structured visual system. The important part is not how complex the system is, but whether the camera can clearly understand the role of each visual layer.
11. Record Clean Audio, Not Just Camera Audio
A DJ video with strong visuals can still feel weak if the audio is distorted, thin, or overloaded.
Phone microphones often capture too much room noise, speaker distortion, crowd noise, or bass overload. For casual clips, that may be acceptable. For stronger social content, cleaner audio makes the video feel more professional.
Better options include:
- Recording from the mixer or controller output
- Using an audio interface
- Syncing clean audio with the video during editing
- Keeping a small amount of room sound for atmosphere
- Testing levels before recording the full clip
- Avoiding distorted bass in the camera microphone
Audio affects how people judge the visuals. When the sound is clean, the lighting and framing usually feel more professional too.
12. Test the Setup on Camera Before Posting
A short camera test can prevent many common problems.
Before recording the full video, film 10–15 seconds and watch it back. Do not judge only from the room. Judge from the camera view.
Check:
- Is the DJ visible?
- Is the background too bright or too dark?
- Are colors too harsh?
- Is there flicker or banding?
- Are lights pointing into the lens?
- Is movement too fast?
- Is the background clean?
- Does the frame work in vertical format?
- Is the audio clean?
- Would the shot make sense to someone scrolling quickly?
This small test helps you adjust lighting, camera height, angle, color, or movement before recording the final clip.
13. Common Mistakes That Make DJ Setup Videos Look Unprofessional
Many DJ setup videos lose impact because of small visual issues that are easy to fix.
Common mistakes include:
- Messy background
- Visible bags, boxes, or cases
- Loose cables in the main frame
- Too many colors changing at once
- Lights pointing directly into the camera
- DJ area too dark
- Background too bright
- Random fast movement during the whole clip
- No flicker test before recording
- Using only distorted camera audio
- Cropping horizontal video badly into vertical format
- No clear visual focus in the first few seconds
A stronger DJ setup video usually comes from cleaner structure: clear frame, controlled color, readable DJ area, useful movement, and clean audio.
Frequently Asked Questions About Making Your DJ Setup Look Better on Video
Why does my DJ setup look better in person than on video?
Your eyes read depth, room atmosphere, and movement differently from a camera. Video compresses the setup into one frame, so background clutter, uneven lighting, harsh colors, direct glare, or fast movement become more obvious.
What lighting makes a DJ setup look better on social media?
Lighting that creates structure works well on social media. A readable DJ area, background color wash, and controlled movement usually look cleaner than a frame filled with random effects. The goal is to help the viewer understand the booth, DJ, and atmosphere quickly.
How do I light a small home DJ setup for video?
For a small home DJ setup, keep brightness controlled, use a clean background, and add color to the wall or booth area behind you. Avoid placing strong lights too close to the camera or pointing them directly into the lens. A simple wash layer and controlled movement can make the frame feel more polished.
Are moving head lights good for DJ videos?
Moving head lights can look great in DJ videos when the movement is controlled. Slow sweeps, background motion, and short accent moments usually work better on camera than constant fast movement. Placement and angle are important because direct beams into the lens can overpower the shot.
Why do my stage lights flicker on camera?
Flicker can happen when the camera frame rate, shutter behavior, LED dimming, and lighting effects interact. It may become more visible at low dimmer levels or during certain strobe and chase effects. Record a short test clip and try adjusting frame rate, brightness, or scene settings.
Should I film DJ content vertically or horizontally?
For TikTok, Instagram Reels, and YouTube Shorts, vertical video is usually the better starting point. For full DJ sets, YouTube uploads, or venue promo videos, horizontal video can still work well. The important thing is to design the frame for the platform instead of cropping as an afterthought.
How can I improve the way my current DJ setup appears on camera?
Start with the frame. Clean the background, adjust camera height, keep the DJ visible, simplify the color direction, control movement, test for flicker, and record cleaner audio. These changes help the camera read the setup more clearly.
Build a DJ Setup That Works Live and on Camera
A good DJ setup should feel right in the room and also translate well on video.
For live performance, lighting brings atmosphere, energy, and movement. For video, the same lighting also needs structure, balance, and clarity.
A strong camera-friendly DJ setup usually includes:
- Clear DJ visibility
- Controlled background color
- Clean visual lines
- Movement that matches the music
- A simple color direction
- A camera angle designed for the platform
- Clean audio
- A short test before recording
Explore Betopper lighting solutions for home DJs, mobile DJs, and s
mall indoor event setups:
https://betopperdj.com/pages/lighting-solution
Hinterlasse einen Kommentar
Alle Kommentare werden vor der Veröffentlichung geprüft.
Diese Website ist durch hCaptcha geschützt und es gelten die allgemeinen Geschäftsbedingungen und Datenschutzbestimmungen von hCaptcha.